Create Partitions Using Windows Disk Manager
 So here’s a trick that I often use when I feel the need/want to experiment with a new operating system. I’ve found that most people don’t know that Windows Vista and Windows Seven both have a neat little system for shrinking the Windows partition on your hard drive to make space for a new partition. In this post, I’ll show you the steps to take to do this on your own.
Step 1
Hit the “Start” button on your Windows taskbar, right click on “Computer,” and hit “Manage.”
Step 2
After a few minutes, the “Computer Management” window will open. Hit “Disk Management.”
Step 3
Wait while the Virtual Disk Service reads your HDD/SSDÂ for partitions.
Step 4
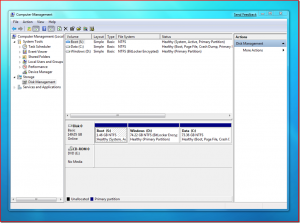
You should see something like the following:
(C:), (your HDD/SSD’s total capacity here) GB NTFS, Healthy (If it doesn’t say Healthy, you might want to check your drive), (System, Boot, Page File, Active, Crash Dump, Primary Partition)
Right click this bar, and hit “Shrink Volume.”
Step 5
The system will check and see how much space you have for shrinkage. Wait for this check to finish. Once it has finished, you should be able to select the size in megabytes that you wish to subtract from the Windows partition.
Step 6
Profit! Once the shrinking process is complete, you can go boot up the install disc for whatever OS you feel like trying and format the new free space a brand new partition.
Note: If you see a small amount of available shrink space but have lots of space free on your drive, you may need to run a disk defrag to move system files out of the last sectors of the disk. This is a unfortunate problem with the partition shrinker.


