How to Create a Windows 7 Embedded Flash Drive

Although Windows 8 was the first consumer Windows operating system that allowed users to create a fully functioning Windows operating systems on a flash drive (on Windows 8 Pro and up) called Windows To Go, it was not the first Windows operating system to have that ability. Predeceasing Windows 8’s To Go feature was Microsoft’s Windows Embedded operating system starting with Windows XP Embedded and followed by the Windows 7 Embedded. Note: If you are a Microsoft DreamSpark user, you can get an evaluation copy of Windows 7 Embedded that last 365 days to try out.
Things you will need
- A 16 GB or bigger flash drive (recommend at least 32GB flash drive)
- Also, try to get the fastest flash drive because the operating environment will be horrible on a slow flash drive.
- Windows 7 Embedded operating system installation
- Windows 7 Embedded License
- If you are a DreamSpark user, go to the DreamSpark website to find the evaluation key.
- An actual computer
- Virtual Machines will not work in this situation because we will need to boot into the flash drive in certain parts of the installation process and it will error out during the installation process.
Section 1: Run Diskpart
We will need to format as an active NTFS partition to install Windows 7 Embedded on. To do this, we have to do the following command (Note: This can be done with other Windows operating system [Vista or higher] or Windows installation disc).
- Plug in the USB you want to have Windows 7 Embedded on
- Load in the Windows 7 Embedded Operating System’s installation disc into the computer
- Turn on the computer and select that you want to boot into the disc drive
- Press any key to select that you want to load the disc.
- After loading the contents of the disc, select
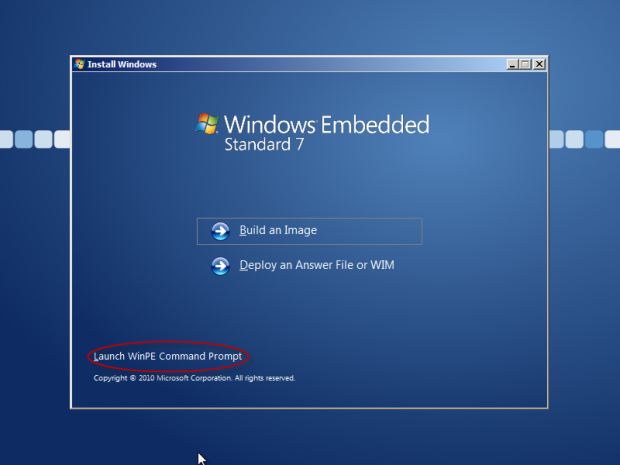
Launch WinPE Command Prompt
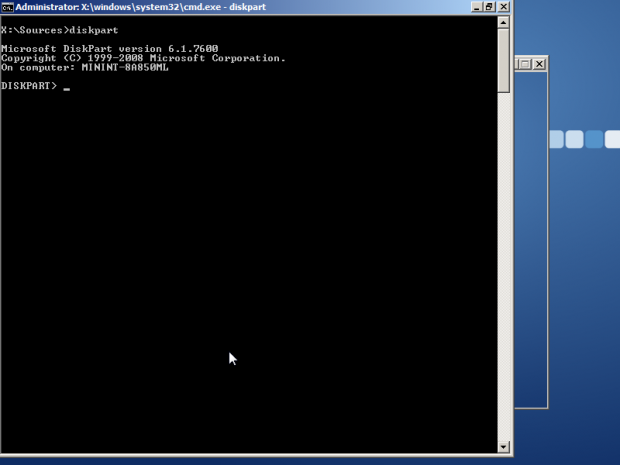
- When you are in command prompt type the command into Command Prompt
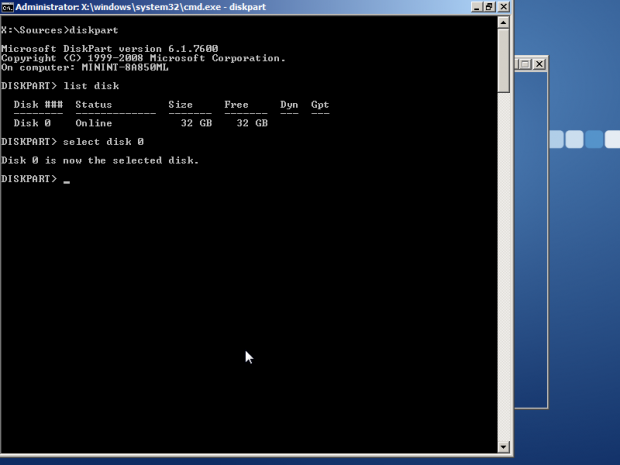
diskpart
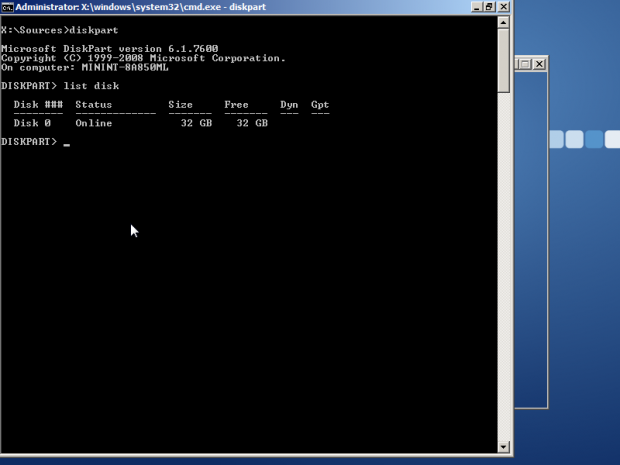
- We will need to list all of the disks available, so we will need to list all of the disks with
list disk
- We will need to select disk we want to use, so we will list the disk with
select disk # (Note: Replace # with the USB drive number containing the disk you want to use to have Windows 7 Embedded on)
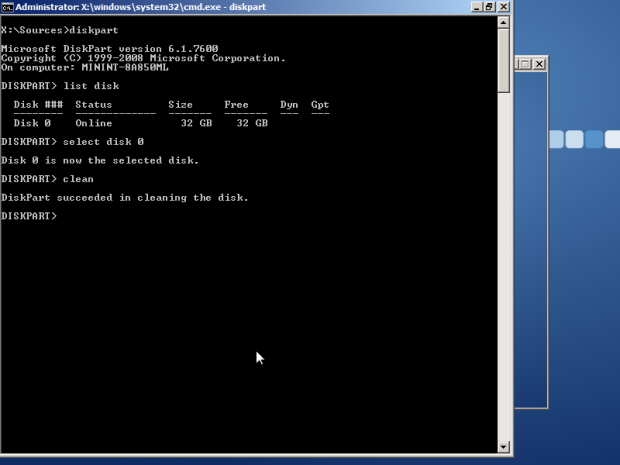
(NOTE: Before proceeding with the next step, you could erase your data if you select the wrong drive to clean. LogicLounge nor its writers are responsible for any lost data or if you accidentally erased your data).
- We will need to clean the current partition of the drive (Warning: Like formatting, you will lose all of the file you have on that drive. Make sure you want to wipe the selected drive and make sure it is the right drive you are selecting [it should be about (and slightly less than) 32GB if you are using a 32GB USB flash drive]) by typing
clean
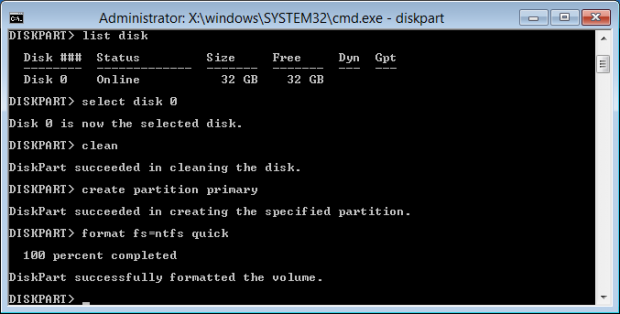
- We will need to create a new primary partition on the drive by typing
format fs=ntfs quick

- We will also need to set it as active by typing
active
- We will need to assign the drive a letter
assign
- We are now done with formatting the drive so we can exit diskpart by typing
exit
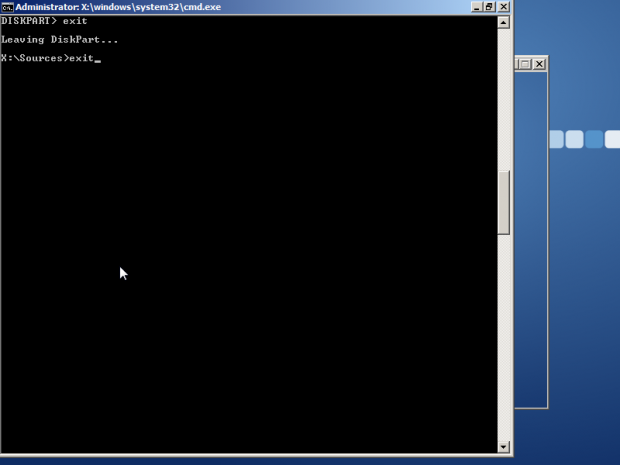
- and exit command prompt
exit
Section 2: Install Windows 7 Embedded
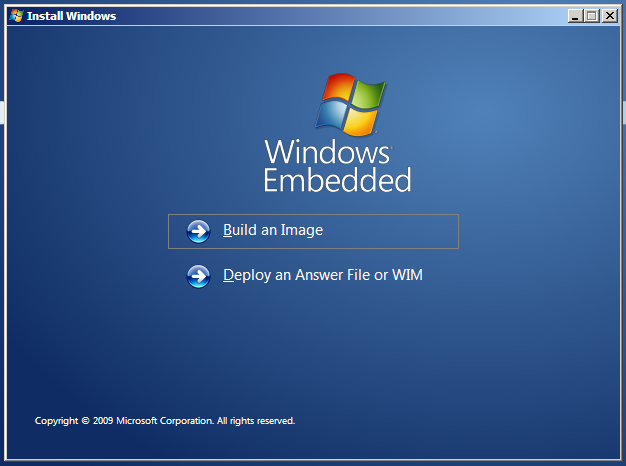
After you have created an active NTFS flash drive, you can now install Windows 7 Embedded onto a flash drive. Reboot the computer and change a setting in your BIOS to boot into the flash drive first. After you changed your boot sequence to boot into the flash drive first, load in the Windows 7 Embedded DVD you received/burned into your computer disc drive and boot to the disc drive. After you boot into the Windows 7 Embedded Disc, select…
Build an Image

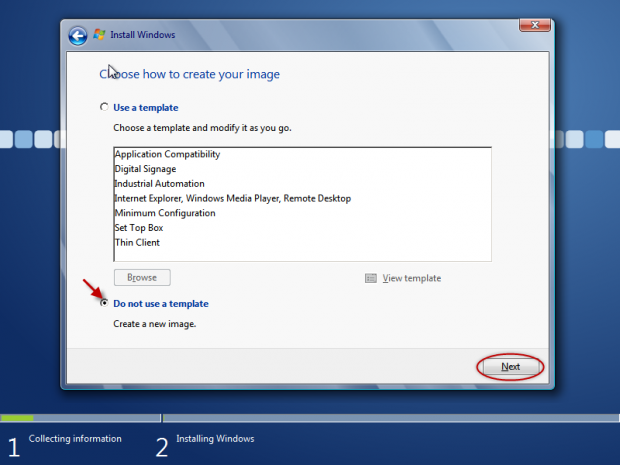
After selecting that you want to build an image agree with the licence terms and conditions. Following that you have agreed with the terms and conditions, select that you…
Do not use a template We chose to not use a template so that we can choose what features we want this flash drive to have.
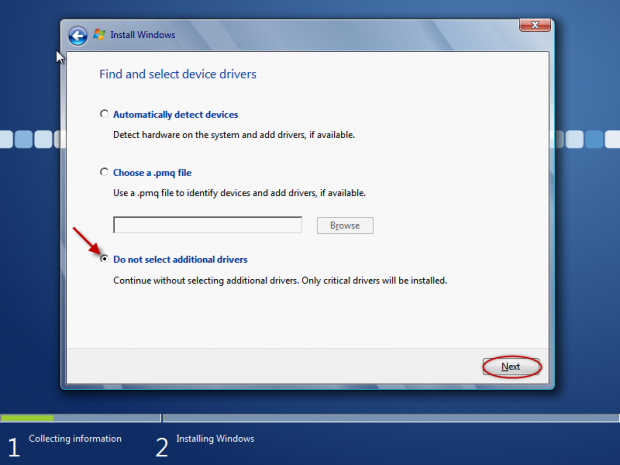
After selecting that you want to create an image from scratch, select your language, time and currency format, and keyboard style. When you are prompted to find and select device drivers, select that you…
Do not select additional drivers When you run the flash drive for the first time on a new computer, new necessary drivers will be installed so that the system will work.
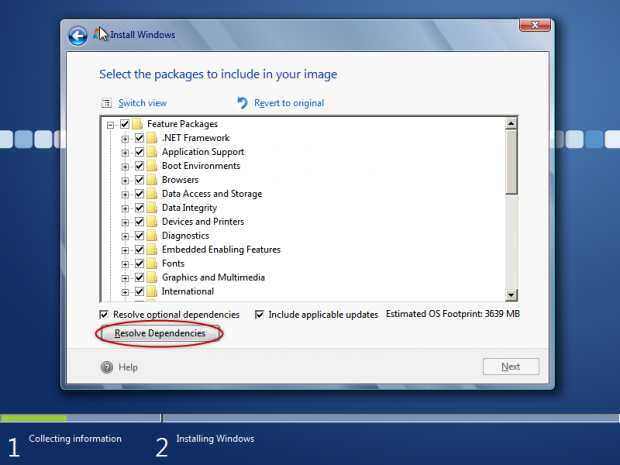
 When you are prompted with what packages to include into your flash drive, select the things that you want to include
Note: Most likely you will select all of the feature packages available in Windows 7 Embedded (to get the most feature out of it) and one or two languages.
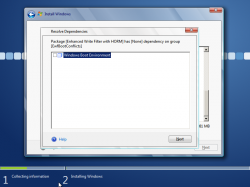
After selecting the features you want to install, you have to fix some of the dependencies before installing Windows onto the flash drive. Select…
Resolve Dependencies
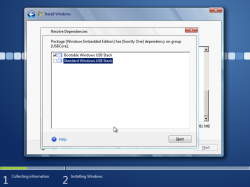
 and select the things that you want
In our tests, we used
- Windows Boot Environment (Uncheck Enhanced Write Filter Boot Environment)
- Windows Embedded Standard Startup Screens (Uncheck Unbranded Startup Screens)
- Windows Explorer Shell (Uncheck Comand Prompt Shell With Custom Shell Support)
- Bootable Windows USB Stack (Uncheck Standard Windows USB Stack)
- Uncheck: Windows Boot Environment


After resolving the list of dependencies, you will be shown with what features you wanted that will be installed to the desired location. 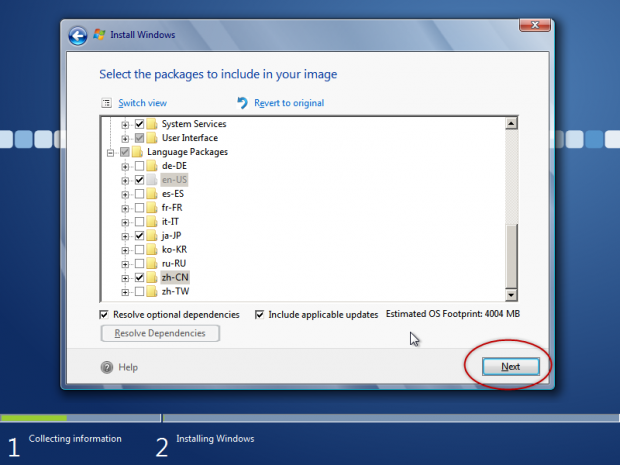
After reviewing the features that will be installed to the desired location, you will be asked where to install Windows 7 Embedded to. 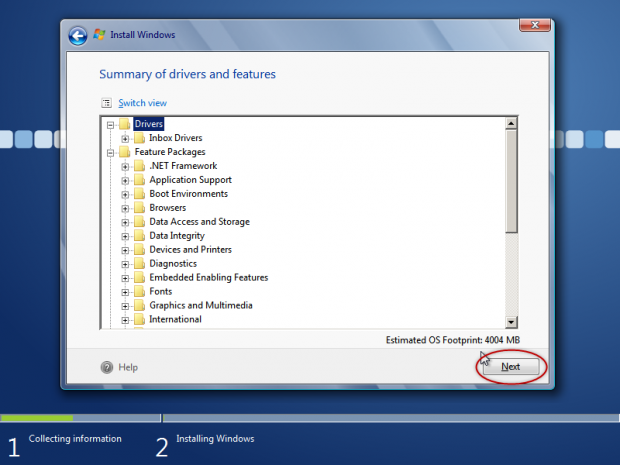
Choose that you want to install Windows 7 Embedded to the USB flash drive. (NOTE: You could erase your data if you select the wrong drive. LogicLounge nor its writers are responsible for any lost data or if you accidentally erased your data).

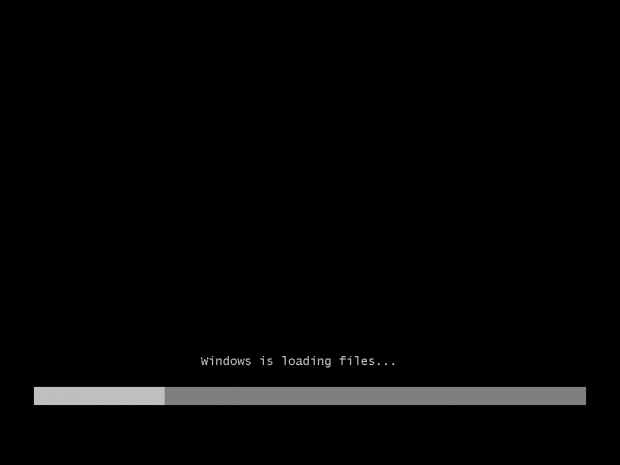
After selecting which drive that you want to install Windows Embeded onto, Windows will proceed to install the operating system to the desired location. While Windows is installing the Embedded operating system onto the flash drive, take some time off to do other things as it can take 2+ hours to install the operating system onto the flash drive. Note that the computer will restart a couple of times (this is why we changed the settings in the BIOS so that the flash drive will boot first) to complete the installation process. 
After installing the operating system onto the flash drive, the computer will restart and boot into the Windows Embedded operating system on the flash drive for the first time and prompt you for the serial number. After you insert the serial number listed on your package (or in your Microsoft Dreamspark account), you will be noted that the key is installed (and note the remaining time you have if you have an evaluation key) and proceed with first time setup processes.
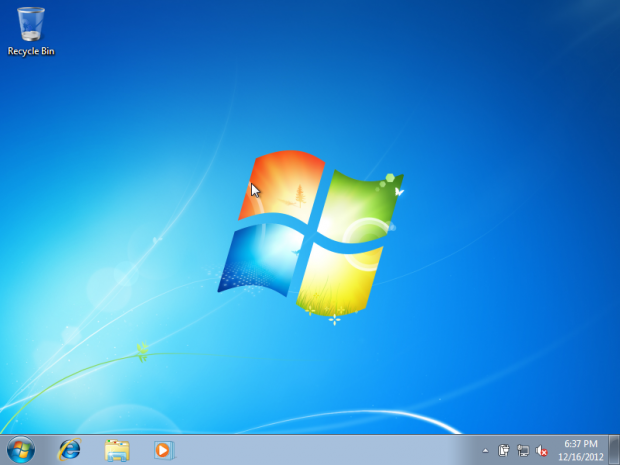
Note after installation: It is best to disable all of the Windows’s Aero design and stick to Windows classic to prevent constant access to the flash drive and keep the operating environment fast and smooth. Also, disable as much start-up applications to prevent a slow boot-up.