How To Replace A Hard Drive In A MacBook Pro
There comes a point in which you have to upgrade components in your computer. Some of the most popular upgrade options for the MacBook Pro can be completed in less than 30 minutes and involve almost no technical skills at all. The two most popular upgrades that we come across is hard drive upgrades and RAM upgrades which are really common with MacBook Pro’s. Today we’re going to be showing you how to upgrade your hard drive in your MacBook Pro, this model is the early 2011 unibody.
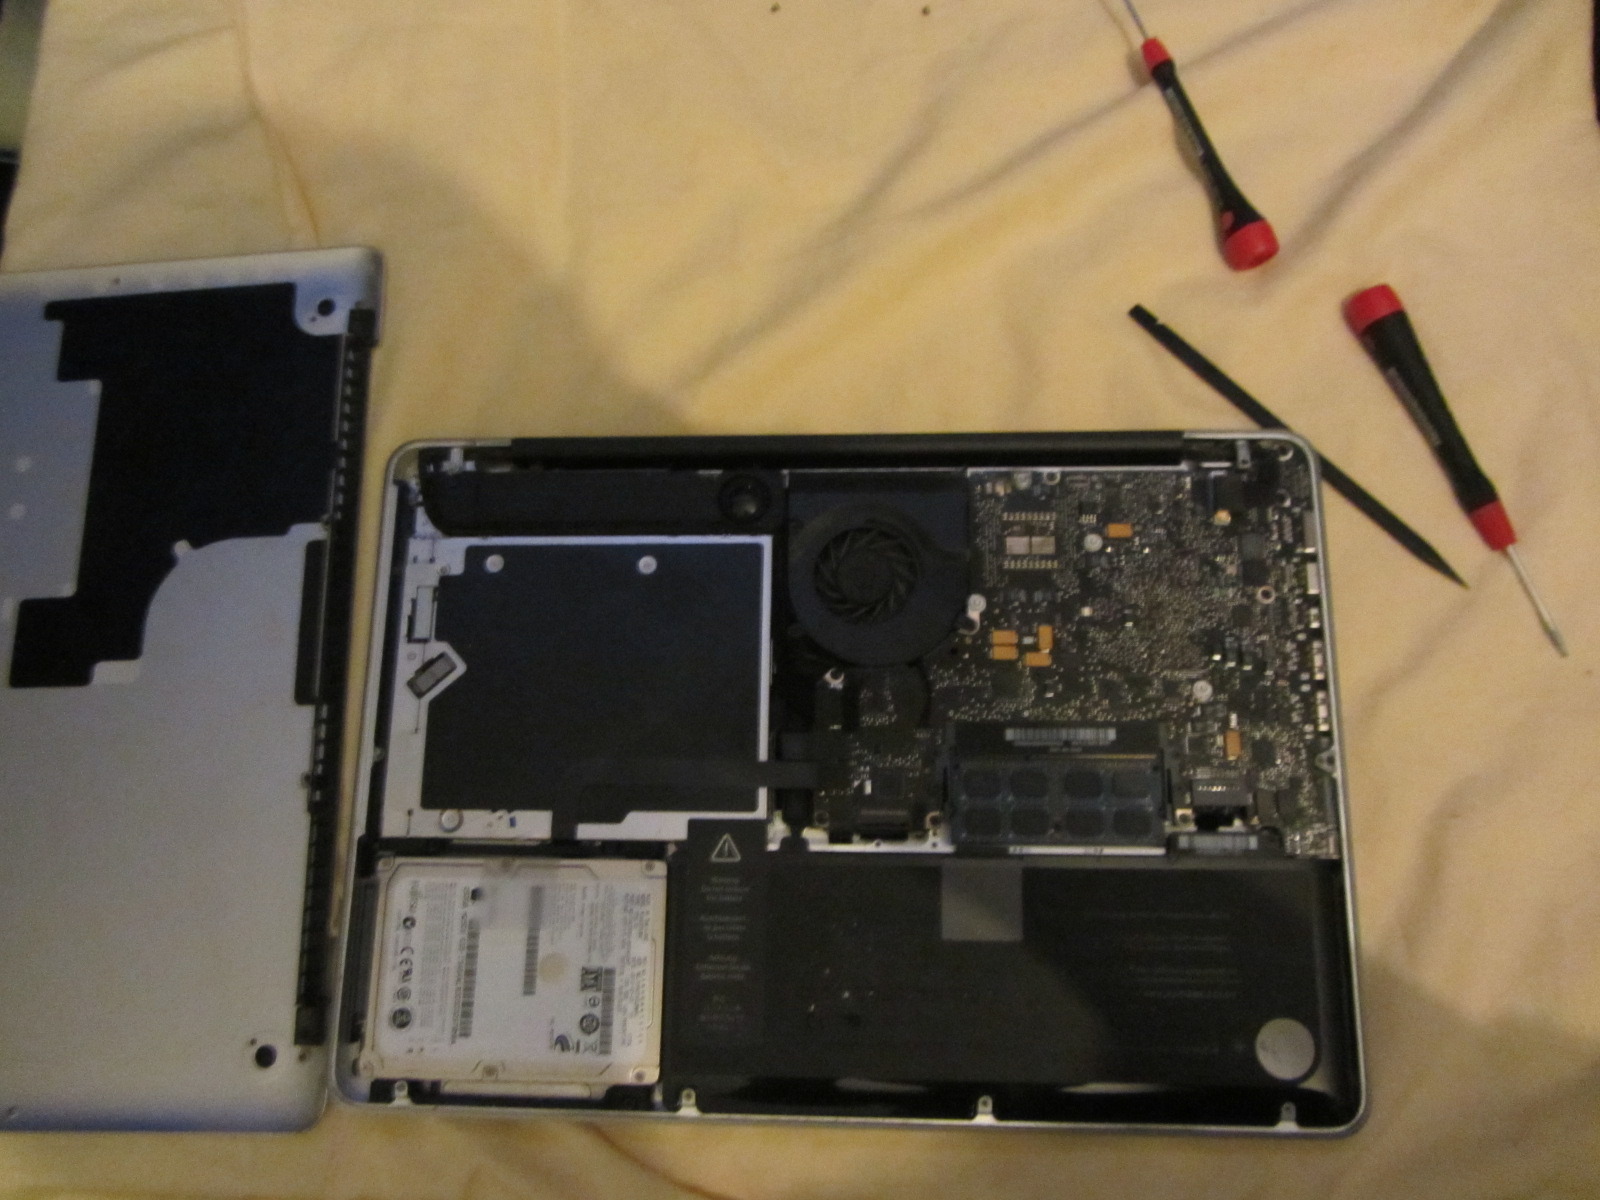
First thing you need to do, is pretty obvious, shut down your computer completely. Once it is off you’ll want to flip the computer over and get your handy phillips screw driver. Starting with the three screws in the right closest to the vent, which are longer than the rest, you want to unscrew all of the screws. ONce all of them are off you’ll want to remove the bottom cover, although the bottom is held in with snaps so you’ll need to tug at it to pull it all the way off.
Once the bottom cover is fully removed you’ll want to set it aside and work on the SATA bay with the hard drive. Before removing the drive you’ll have to unscrew the bracket holding one side of the drive in place. There are two phillips screws holding it in place.
Setting the bracket aside slowly remove the SATA drive just enough to lift it up from the case, from here you’ll want to remove the SATA cable and put it back into place. From here you can fully remove the drive from the bay without any trouble.
We’re not done with the drive yet because it has four torx screws to help mount the hard drive in place. With a torx screw drive you’ll need to remove all four of those screws and transfer them over to the new drive in the same locations as were found on the original drive.
To mount the drive back into place you’ll want to reconnect the SATA cable into the connection on the drive. Once the STATA port is reconnected you’ll need to remount the drive back into the bay entering the pegs back into the according sockets. After it’s back into place you’ll have to secure the bracket back into place.
After that you’re all done, resecure the bottom to the MacBook Pro and screw back in all of the screws starting with the top three longer screws and moving your way around. Last step to do is boot up your computer and install your operating system.
Just like that you’ve replaced a drive in your MacBook Pro.